Category: Montessori at Home

Category: Montessori at Home

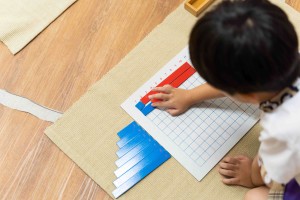
Children engaging with educational beads at House of the Hill Singapore, fostering curiosity.

Chinese New Year Yu Sheng Prosperity Salad & Ingredients

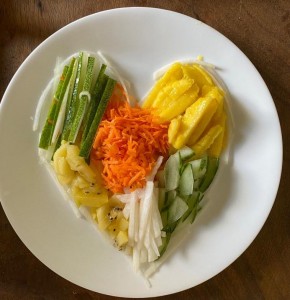
鱼生 or Yú Shēng is traditionally a spring salad eaten by the Chinese community in Singapore and Malaysia to celebrate the Chinese New Year. It is considered a symbol of prosperity. You may have taken part in the shouting of well wishes as the salad is tossed by everyone at the table! Fun for the adults – and fun for children as well. In this Montessori at Home Activity, we have created a simple and healthy recipe to plan and prepare with your child. Jump to Recipe & Montessori Tips 4 Beautiful Locations Islandwide At House on the Hill, we strive to embody the true Montessori method and philosophy in every lesson and activity. Book A Tour Our Mount Sophia Parent Liaison Yng Sze and her family kindly tried our recipe out for us. After making their shopping list, they trooped off to the supermarket to pick up the ingredients! Here they are selecting their cucumbers and radishes. It was time to prepare the ingredients when they got home!  Don’t forget the sauce! Time to Lo Hei!  Don’t forget to say the well-wishes out as you build the salad! And toss! 新年快乐!Happy New Year to everyone celebrating this festival!  Healthy Yu Sheng Ingredients and Recipe for Children Suggested Ingredients: 100g fresh smoked salmon, thinly sliced *please note that this is to replace the raw fish component  2 cups white radish, thinly shredded 2 cups carrot, thinly sliced 1 cup cucumber, thinly shredded 1 red capsicum, thinly sliced 1 tsp pickled ginger, thinly shredded 4 sprigs of fresh Chinese parsley ¼ cup of chopped peanuts, roasted and unsalted Toasted sesame seeds for garnish 1 tbsp five spice powder ¼ cup whole-wheat crackers, crushed Dressing: ½ cup of plum sauce 1 tbsp lemon juice ¼ cup of water 1 tsp peanut/ corn oil 1 tsp sesame oil 1/8 tsp five spice powder (Serves 6 to 8) Method: To make the dressing, combine all dressing ingredients and set aside. Arrange the fish slices in the centre of a large platter. Place each type of vegetable in sections around the platter. Sprinkle the pickled ginger, peanut, sesame seeds, parsley and whole-wheat crackers over the vegetables. Pour the dressing evenly. You are ready to toss for good health! Recipe adapted from the Singapore Health Promotion Board  Here is a helpful guide video about the ‘lucky phrases’ to say while you’re tossing the salad.  Tip: Play the video while they’re adding the ingredients to the salad! It’s OK to get as messy and playful with the tossing as possible. P.S. Don’t forget to get everybody a set of chopsticks!  Montessori Tips:  Food and cooking are some of the best and most fun ways to include Montessori learning at home. Children love being involved in cooking for the family and being able to contribute in some way. They are also more receptive to eating (or trying something new) the food they have prepared.   Engage your child by giving them a part in picking the ingredients to purchase: write the shopping list together and ask them to help you find items at the shop. What would they like in the dish and why? This is a great, fun way to have discussions about healthy food and how it nourishes them. There are lots of variations but yu sheng typically consists of raw fish strips (replaced with smoked salmon in our child-friendly recipe), crackers, shredded vegetables, five spice powder and a sweet plum sauce.  When you are planning this activity, feel free to substitute with your child’s favourite fruit and vegetables – they may even prefer their favourite savoury cookie instead of crackers! Once you get home, the little sous chefs can help out in the kitchen. Let them wash, prep the vegetables and lay them out in bowls. Prepare a small knife to cut the vegetables (supervised). Make sure there are bowls and spoons ready to measure out the ingredients for the dressing. Older children can help you to measure out the ingredients for the dressing together too. While you’re working on this together, have discussions about colours, smells, tastes and textures.  Check out our Free Montessori at Home Activity Booklets! This is a collection of Montessori at Home activities that you can do with your child. All are engaging and fun, but they also have developmental intentions. They are easy to do and require minimal preparation. Most materials can already be found in the home! Highlights Tips on how to get the most out of these booklets  How to create the ideal learning environment at home  Guidelines for each age group   Easy to do Montessori at Home activities for you to learn and bond with your child over   Montessori Tips for each activity Learn More

Read More »

Montessori At Home: Christmas Truffles

Jing, House on the Hill Founder and Mum of Kai and Hans, made some Christmas Truffles with the boys as a Montessori at Home activity! Let’s see how they got on! First, they discussed how to make it, made a shopping list together, then they picked the items from the supermarket together with Daddy and Mummy. Sticking to Montessori principles at home, Jing laid all the ingredients out for them. Kai chopped the chocolate buttons up Hans helped to transfer all the chopped chocolate into a prepared bowl Kai measured out the cream He stirred it on the stove Hans helped to stir the mixture together Kai put his apron on and poured the chocolate sprinkles out He coated the truffles with sprinkles carefully Here’s the final product! Doesn’t it look good? They popped them into the fridge to set. The next day, it was time to taste their Christmas truffles! A resounding thumbs up of approval! Here’s the recipe and some Montessori at Home tips for you to try this for yourselves at home! Chocolate Truffles Who doesn’t love chocolate? This simple recipe (adapted from BBC Good Food) is crowd-pleasing and easy to make! Be prepared for a delicious mess, and lots of lip smacking, finger licking fun! Ingredients: 150g dark chocolate, chopped 150g milk chocolate, chopped 150ml double cream 50g unsalted butter cocoa powder, sprinkles, lustre powder, icing sugar, chopped nuts, for coating flavourless oil (such as sunflower), for shaping How to:  STEP 1 Put the dark and milk chocolate in a bowl, then put the cream and butter in a pan and bring to a simmer. Pour the hot cream over the chocolate and stir until it melts. Leave to cool, then chill in the fridge for 7 hrs. STEP 2 Put the coatings into separate bowls. To shape the truffles, lightly rub your hands with flavourless oil and roll teaspoons of the truffle mix between your palms – this can get messy! STEP 3 Gently roll the truffles in the bowl until evenly coated, then put in a box and chill. Store in the fridge in an airtight container for three days, or freeze for up to a month. Defrost in the fridge overnight. Montessori tips: Your child is the chocolatier today and you are there to help guide your child through the steps. Begin with a prepared environment and make sure the materials are all ready:  ingredients, bowl, large spoon. Let your child do the scooping, stirring, and rolling into balls. Focus on just one step at a time, and if your child does not know how, begin by doing the action slowly and quietly and letting them observe, and then give them the opportunity to do it on their own. Enjoy the finished product together! And remember, they can help clean the bowls when you are all finished! Pop these homemade Christmas truffles in a pretty box if you want to give them as a gift. Children will love giving them to family and friends, plus preparing the gift is an additional Montessori at Home activity. Want More Montessori At Home Activities? Download Our Free Montessori at Home Booklets! Montessori shouldn’t end when school ends. We have created a collection fun and engaging Montessori at Home activities for infants, toddlers and children in nursery and kindergarten! Learn More

Read More »

Montessori At Home: 3 Ingredient Easy Energy Balls

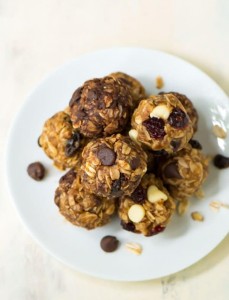
We love simple recipes that our children can help with. Do you remember our two-ingredient cookies? This month we have another great recipe that has a few more ingredients, but doesn’t require any baking: Easy Energy Balls, adapted from Well Plated.  3-ingredient Easy Energy Balls Ingredients 1 ¼ cup rolled or quick-cook oats  ½ cup nut butter  ⅓ cup honey or maple syrup  Optional Add-ins: 2 tablespoons: Chia seeds or flax seeds  ½ cup: raisins, chopped nuts, few chocolate chips, coconut flakes, or anything else you feel like trying!  How to:  Add all the ingredients to one bowl and stir to combine  If it seems too wet, add a few more oats. If it is too dry, add a bit more nut butter (it should hold together when squeezed) Refrigerate the bowl for 30 minutes  After refrigerating, scoop the mixture into heaping tablespoons and roll into bite-size balls   Enjoy!  Montessori tips: Your child is the chef today and you are there to help guide your child through the steps. Begin with a prepared environment and make sure the materials are all ready:  ingredients, bowl, large spoon. Let your child do the scooping, stirring, and rolling into balls.  Focus on just one step at a time, and if your child does not know how, begin by doing the action slowly and quietly and letting them observe, and then give them the opportunity to do it on their own. Enjoy the finished product together! And remember, they can help clean the bowls when you are all finished! Photo credit: Well Plated

Read More »

Montessori at Home: Grocery Store Field Trip!

We like to involve children in the kitchen, but before any food preparation can begin, we have to head to the grocery store! Teaching children about shopping is a great practical life skill that they are sure to show a lot of enthusiasm about.  4 Beautiful Locations Islandwide At House on the Hill, we strive to embody the true Montessori method and philosophy in every lesson and activity. Book A Tour Every good project begins with a list. It is easiest if you have a specific recipe in mind that they can reference for the creation of their grocery list. Help them check the kitchen to see which ingredients you already have on hand, and which you’ll need to purchase. Help them with spelling if needed, or encourage them to draw pictures of the ingredients next to your writing (you can look up photos online for their reference if they don’t know what it looks like). Once you have the list, talk to them about the types of food you have listed and where they might be found in the store. For example, milk and yogurt will be in the dairy section. Flour and sugar will be together with other baking supplies. Rice and pasta will be with dried goods. Help them organise their list according to grocery store sections.  With the list in hand (and a pen or pencil), head to the store! If they’re familiar with the layout of the grocery store, let them guide you around and search for everything on their list. If they need some help, guide them to one section at a time and check the list for ingredients in that section. As you find each item, check it off the list and add it to the basket.   As they gain practice in finding the ingredients, you can begin to introduce price to your child. Younger children can practice reading the numbers and learning vocabulary like “this costs” or “the price is ___ dollars”. For older children, the grocery store is a great place to practice estimation instead of exact addition. Can they estimate how much the groceries will cost? They can also help count the money during checkout.  Happy shopping!

Read More »

Montessori At Home: Playdough Practice

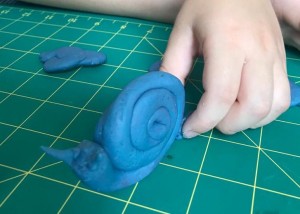
We often talk about involving children in the kitchen, but that doesn’t mean they’re professionals right away! Just like anyone, they need time and space to practice, and not every meal lends itself to their experiential help. That’s why we’re big fans of playdough! Making and playing with playdough is fantastic practice for many kitchen skills: measuring, mixing, rolling, cutting, and even chopping. Plus, it’s an easy, at-home activity that can keep children entertained for hours. Making the Dough  There are many, many recipes for homemade playdough. No matter which one you choose, involve your children in the process of making it. They can help measure the ingredients and mix it all together (with their hands or a spoon!). Let them help clean up, too. Help them prepare a tub or sink of soapy water to wash the bowls, a towel to dry, and a rag to clean their work surface.  Playing with the Dough  You can buy plastic, playdough-specific tools but we think it is just as good (or even better!) to use what you have in the kitchen so children can learn to carefully use real materials under parental supervision. Pull out cutlery, rolling pins, cookie cutters, and spatulas for them to use. If anything has a sharp edge make sure to demonstrate to your child how to hold and use the tool properly. Bonus: as they roll, pinch, squish, and shape their dough they’ll be practising fine motor skills!  Keeping the Dough  When they are finished for the day provide them with plastic bags or airtight plastic or glass containers to keep it in and remind them to wash the tools they used. If possible we recommend keeping the dough and a few tools on a tray on a low shelf or another accessible area. This mimics the Montessori classroom where children can choose their own activities, and it helps them to take responsibility for keeping their materials when they are done.

Read More »

Montessori At Home: Making Bubbles

4 Beautiful Locations Islandwide At House on the Hill, we strive to embody the true Montessori method and philosophy in every lesson and activity. Book A Tour Sometimes it is the simplest of materials that bring the most wonder, and that is definitely true about bubbles! These sudsy creations are fun for the whole family and are a simple at-home science experiment. Homemade bubble recipes abound, but we’re partial to this science-approved version. In a large bowl or container help your child measure and pour 6 cups of water and 1 cup of dish soap. Your child can gently mix it together until the soap is dissolved, but try not to let foam or bubbles form (yet!). Next add the secret scientific ingredient: 1 tablespoon of glycerin (or ¼ cup corn syrup). For best results let the bubble solution sit overnight. While you wait, prepare your bubble wands. You can try pipe cleaners, string, cookie cutters, coat hangers, or whatever else inspires you. With younger children, focus on the bubble blowing and ask questions. How many bubbles can you blow with one breath? What happens when you poke your finger with the bubble? Do different wands make different bubble shapes or sizes? For older children, you can introduce some of the science behind the bubbles. The outside of the bubble is actually three layers; two layers of soap sandwiching a layer of water. When the water evaporates the bubble pops! The glycerin helps thicken the soap and prevents the water from evaporating as quickly. You can even make a bubble solution without the glycerin and compare! Montessori Tips:  Prepare the space ahead of time for your child; choose a low table or somewhere they can easily reach and have all the supplies laid out (if they’ll be helping to measure the water you can have a large jug and the measuring cup there). When it comes time for blowing the bubbles place the solution outdoors on the ground where they can access it. Get their assistance in cleaning up and putting away the materials to complete the work cycle. Resource Links: Home Science Tools: https://www.homesciencetools.com/article/how-to-make-super-bubbles-science-project/ Photo by Zlatko Đurić on Unsplash

Read More »

Montessori At Home: Estimation Jar

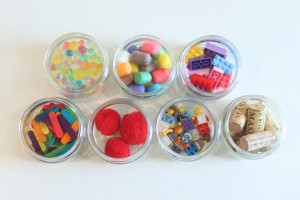
Estimation is a mathematics skill that we all use every day. We might estimate how many people are in a room, how much our dinner bill might cost, or how long it might take to get through a queue! Estimation skills begin with basic numeracy and practice, and an at home estimation jar is an engaging and instructive tool, plus it can be fun for the whole family!  An estimation jar is a clear jar with a certain number of one item inside (for instance, 5 golf balls or 100 beans). Everyone in the family should take turns guessing or estimating how many items there are. Each person can write down their estimations and at the end of the week (to build anticipation!) the items inside are counted to see who was closest.  To make your own estimation jar begin with a medium size clear jar with a lid and place it on a shelf or table where children can reach it. They will need to be able to pick it up, hold it, and look at it from all angles.  For children around 2 years old use just a few large objects. You can try 3 or 4 balls or blocks. Try to make each object the same size, but a different color. When a child is first learning about counting, and thus is very new to estimation, we want to make success achievable.  As children age and learn more about numeracy and estimation, you can make the jar more difficult. You can make the objects progressively smaller, and thus the number progressively larger. You can also introduce a “referent”, or a jar with a few of the same object where you tell your child how many there are (for example, “this jar has 20 marbles, how many do you think are in the full jar?”).  Remember to go slow and keep things at their level, if they don’t know the number 100 there shouldn’t be 100 objects inside. Estimation is tricky and a skill that is learned through a lot of practice! You might even stump yourself! And if you’re stumped on ideas for what to include in the jar, check out this list.   Video Resource: My Works Montessori have a wonderful video on this exercise.  

Read More »

Montessori At Home: Breathing Exercises

Children feel an entire spectrum of emotions, even if they don’t have the vocabulary to express it. Our work as teachers and parents then is in helping them to manage their emotions and their consequent actions. This is important work inside the classroom and at home, and requires practice and patience.  In Montessori practice we do not send misbehaving children to a time out on their own. Instead, we invite them to sit with us until they are ready to go back to work and respect the freedoms within the limitations of the classroom. While they sit with us we can help them to calm down and identify their emotions. It is important for children to know that even when they are behaving badly we love them and want to help them. By inviting them to sit with us we are not condoning bad behavior, but we are building a path toward better behavior. This is a replicable practice at home, too!  Another avenue toward emotion regulation is through breathing exercises that will help your child (and you!) calm down in moments of frustration or other big emotions. First introduce to your child the idea of inhale and exhale, breathing in and breathing out. Useful metaphors are smelling flowers for inhalation and blowing bubbles for exhalation. Have your child lay down and place their hand on their belly and feel it grow bigger as they breathe in, and go down as breath out. You can help count for them as they breathe in for four counts, out for four counts. For a list of other breathing exercises and tips for children, check out this link.  Talk to your teachers and the staff at the school for more ideas about helping your child manage their emotions and behavior. 

Read More »

Montessori At Home: Making Popsicles!

On hot days there is nothing more refreshing than a popsicle. Making them at home is a great way to include your child in the kitchen and to make sure the popsicles are healthy and low in processed sugars! Here, we’ve collected two easy recipes that your child can help prepare!  First, check that you have all your materials. If you don’t have popsicle molds, no problem, you can use recycled yogurt cups, a muffin tin, or even an ice cube tray for mini pops! You’ll also need some popsicle sticks, a blender, and a freezer.  Watermelon + Strawberry + Lime  Ingredients  3 or 4 cups of cubed watermelon  1 cup strawberries Juice of 1 lime  First cut the watermelon into large pieces, and then show your child how to use a butter knife to cut it into cubes and measure 3 to 4 cups.  Your child can wash the strawberries and use the same knife to remove the leaves (for a fun new skill you could also try this strawberry hulling tool)  Using a juicer or just by squeezing help guide your child to juice 1 lime.  Add all the ingredients to a blender and puree until it is smooth.  Your child can pour the mixture into the molds  Place foil or plastic wrap over the filled molds. Poke a small hole above each popsicle and let your child place the stick into the popsicle.  Freeze overnight!  Berry + Secret Spinach  Ingredients  3 cups of mixed berries (frozen or fresh)  1 cup (or more!) of spinach 1 cup of orange juice 1 cup of water  Help your child wash the spinach and berries, if they are fresh  Help your child measure the ingredients and blend together until smooth (the spinach blends in perfectly and the taste is hidden by the berries, giving you an extra dose of veggies!)  Your child can pour the mixture into the molds  Place foil or plastic wrap over the filled molds. Poke a small hole above each popsicle and let your child place the stick into the popsicle.  Freeze overnight! 

Read More »

Montessori At Home: Mystery Bag

The Montessori sensorial curriculum engages a variety of your child’s senses. Many of them we can easily list: visual senses for sight differentiation, tactile senses to learn through touch, baric senses to feel pressure and weight, auditory sense to hear a range of pitch, olfactory and gustatory senses for smelling and tasting. One that we might not know by name, however, is the stereognostic sense, or the ability to recognize objects by touch alone.  It’s such an important sense that scientists are attempting to engineer sensors that mimic it for use in prosthetics. And compared to that task, practicing the stereognostic, or tactile differentiation sense at home is easy!  This activity is taken right from the Montessori classroom’s shelves, and it is called “The Mystery Bag.” You’ll need a medium sized opaque cloth bag and 2 to 7 different small objects (sea shells, buttons, coins, paper clips, keys, clothes pegs, rocks, or crayons would all work great).  Sit with your child on the floor. One by one take each object out of the bag and identify it together, lining them up in front of your child. Once they’ve all been named, have your child put them back in the bag.  Next, your child will reach into the bag, feel one object, identify it, take it out of the bag, and check their answer. Start with just 2 or 3 objects and let your child reach in and choose which one to identify first. As they develop this sense you can add more objects and the one they need to find next. You can also work with an identical set of the objects, letting your child see the object that they are feeling.   

Read More »