Montessori at Home: Learning Responsibilities at Home
Thinking about setting up a Montessori home learning environment? This is a fantastic way to reinforce key Montessori principles, foster positive educational habits, and participate in your child’s developmental journey at home. The Montessori concept of “help me to do it myself” is the most important principle to keep in mind when setting up the Montessori activity.
With Montessori education, the goal is for your child to learn through authentic experiences. Using everyday household objects also teaches an important lesson: responsibility. Children learn to treat their things and the possessions of their friends and family with care.
It’s essential to remember that the Montessori experience isn’t limited to a room for learning. Your child doesn’t stop learning and exploring when they put a book back on the shelf or clean up their art supplies. The Montessori experience is a whole-home experience – from the kitchen to the bathroom, from the bedroom to the living room.
The goal of all parents is to help guide your child to become a happy, healthy, and independent individual. Your child will develop their inner discipline and work towards the path to independence when they are given ample opportunities to complete the tasks set up in the Prepared Environment at home.
Here are our top 4 activities
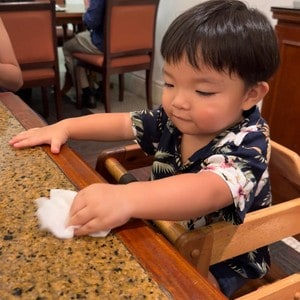
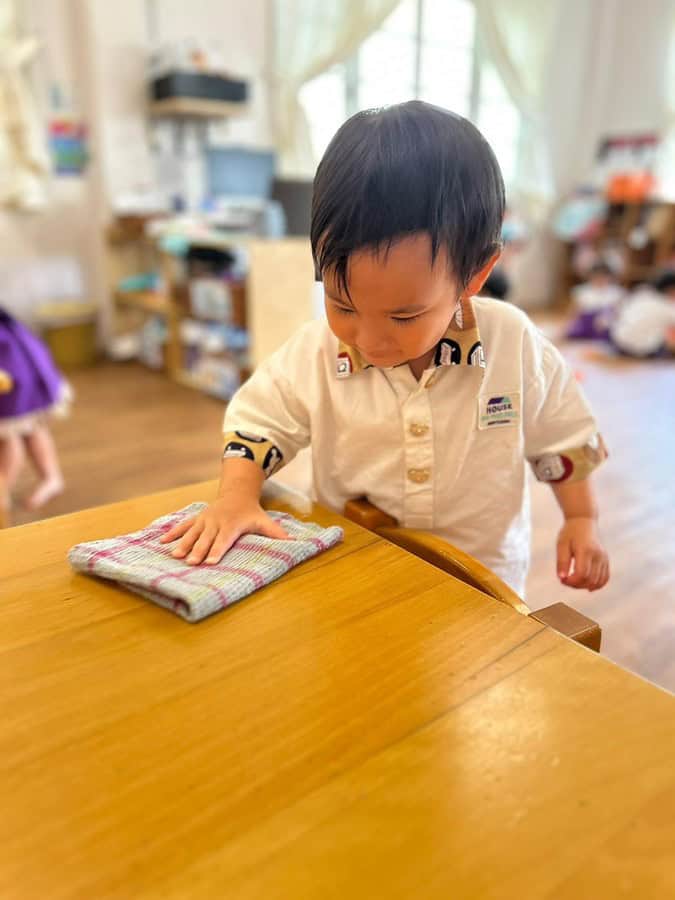
1. Keeping the House Clean
Children love to help clean, sweep, scrub, and wipe. These chores allow them to practise their physical movements and manipulative tasks and engage them in keeping the home clean.
Remember to first demonstrate the task step by step, and model the whole process while your child waits and watches until you are finished. Once you hand the task over, try not to interrupt or comment, so your child can experience a sense of accomplishment, with every attempt they made.
It may not be perfect in your eyes, but it is important to let your child be satisfied with their accomplishment and efforts!
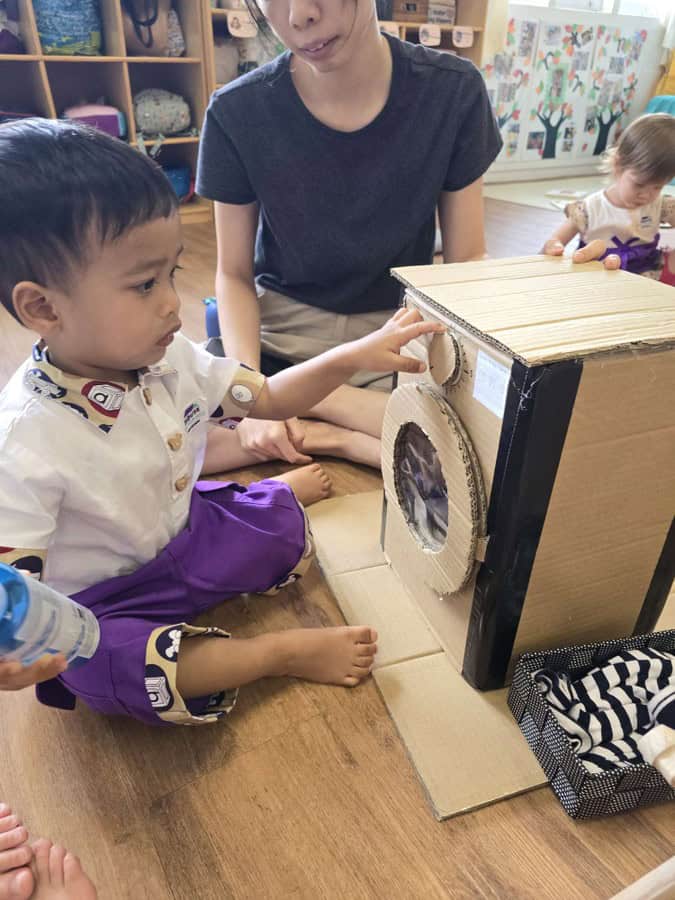
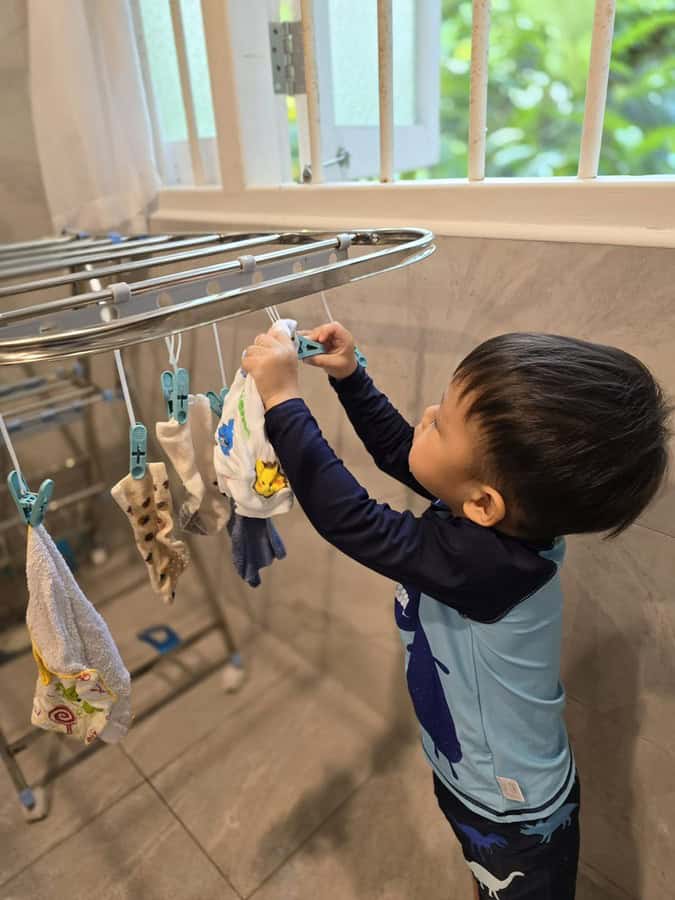
2. Taking Care of Laundry
How to make a washing machine out of cardboard.
You’ll need the following tools and materials to build your DIY cardboard washing machine.
Materials
- Used Cardboard Box
- Duct Tape
- Electrical Tape
- Kraft Paper
- Cutter
- Scissors
- Marker
- Glue
- Round Laundry Basket
- Round Objects (such as bottle caps; to serve as control switches)
Instructions
- Design the front panel – Using the recycled cardboard box, outline. First, you can draw a big circle for its door. You can use your laundry basket as a pattern. Then, draw some small circles for the buttons. You can add some, numbers, and other features. Then colour them according to what design you want. You can even paint it. Anything creative.
- Make a door – Draw the door onto the cardboard and cut the circle. You can choose to have the washing door on the front or at the top. Attach a small and light door handle. Then, re-attach the door using a hinge.
- Assemble the body – You can now assemble the box to make the body of the washing machine.
- Add a laundry basket.
- Check the size – Make sure the sides are fully attached. You can use glue or a glue gun and support with duct tape to maintain further shape.
- Next, ask your child to pick the clothes he or she would like to wash in the washing machine.
- Once the clothes are cleaned, ask your child to hang them on the clothesline to dry. If your child would like the clothes wet for the full effect, add water into a bucket for them to wash in cold water, making sure they wring out the clothes before handing them on the line.
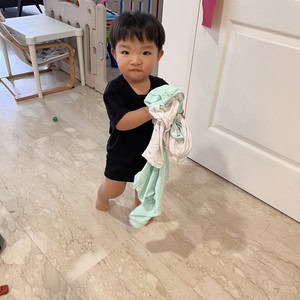
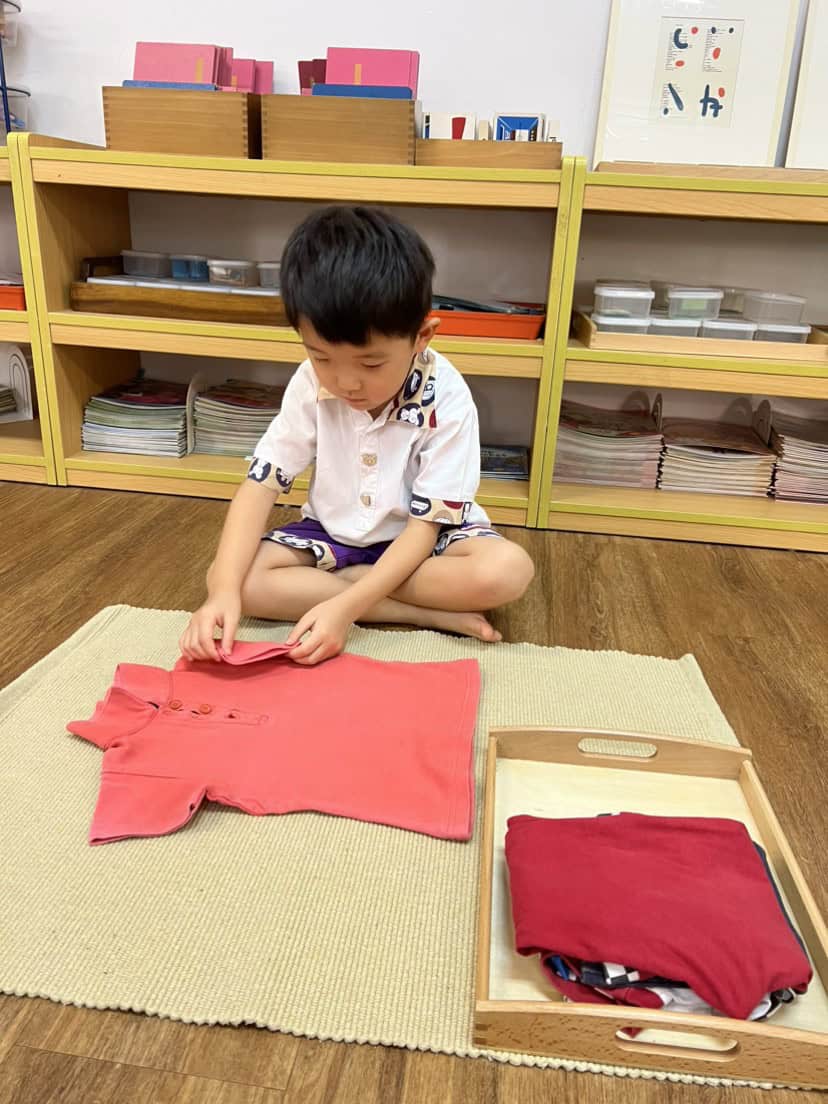
3. Folding Clothes
Folding clothes also encourages children to spend lots of loosely structured time purposefully and wisely in activities that promote: Learning new words and gaining language skills.
How to make this easy DIY child-sized folding board.
Materials
The materials that you need for this project are cardboard, scissors, and tape.
Instructions
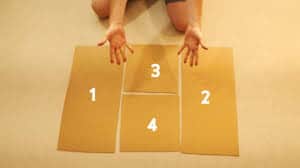
- The cardboard should be 55cm x 50cm.
- Important to remember the two flaps must be equal in width. Shown below are the pieces marked and labelled.
- Use the scissors to cut along the lines.
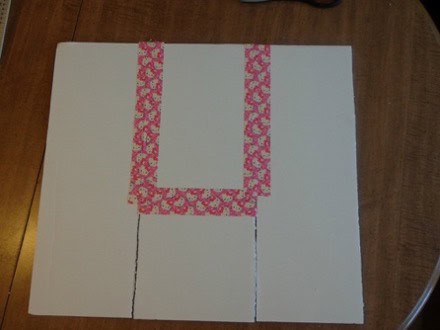
- Now we add the tape onto the back of the pieces and as per the display below. The key is that the side flaps and the bottom flap must be able to fold. The tape is the “hinge”.
- Ask your child to pick a shirt they wish to use for the folding board.
- Place the item on the folding board.
- Fold one flap and the shirt over then fold the other and shirt over (see picture below).
- Bring the flaps (without the shirt) back flat.
- Fold up the bottom flap and shirt. Bring the bottom flap back down without the shirt.
- Then watch as your child is proud of their effort at folding his or her shirt.
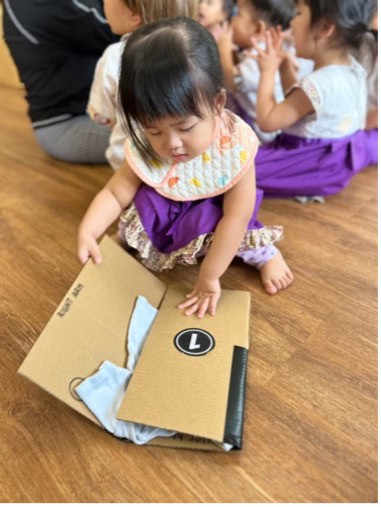
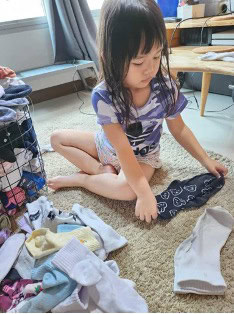
4. Sorting and Organisation of Clothes
Doesn’t it feel like children outgrow their clothes with amazing speed? This is a good time to empty closets of clothing they have outgrown, as well as sorting through and organising them so that children can become more independent and take care of their belongings on their own.
Children as young as 2 years old can begin to learn sorting. Have your child help match and sort out socks, or they can sort their clothing by colour. Not only does this build math skills and help them identify colours, but it can become a fun game for them as well!
For older children, guide them to fold or hang the clothing up. Model how you want them to do it and try not to expect perfection immediately. Practice makes perfect!
Important Tips to Remember
- Freedom of Choice: Encourage your child to choose an activity based on their interests.
- One Activity at a Time: Teach your child that they may work with any activity they choose, but that they may only work with one material at a time.
- Pack Away First: Teach your child that they must pack away the material they are working with before they move on to their next activity.
- Keep the House Tidy: Encourage your child to truly care for their environment by finishing each lesson with a reminder about pushing in their chair, throwing away scraps, bringing food dishes to the kitchen, dusting the shelves, and washing their hands. This will become automatic for your child over time.
- Independence: Set up the activity, so that your child can easily access activities on their own. Try to facilitate your child’s independence so they can learn to do and think for themselves.
- Self-Correction: Allow your child the time and space to correct their own mistakes. If they complete an activity incorrectly or don’t finish at all, do not correct their work. Let them come back to it when they are ready.
- Language Skills: Encourage your child to use their “quiet” inside voice and use their words to express themselves clearly and calmly. Teaching your child to communicate their feelings will help with de-escalating tantrums and encouraging positive behaviour and manners.

